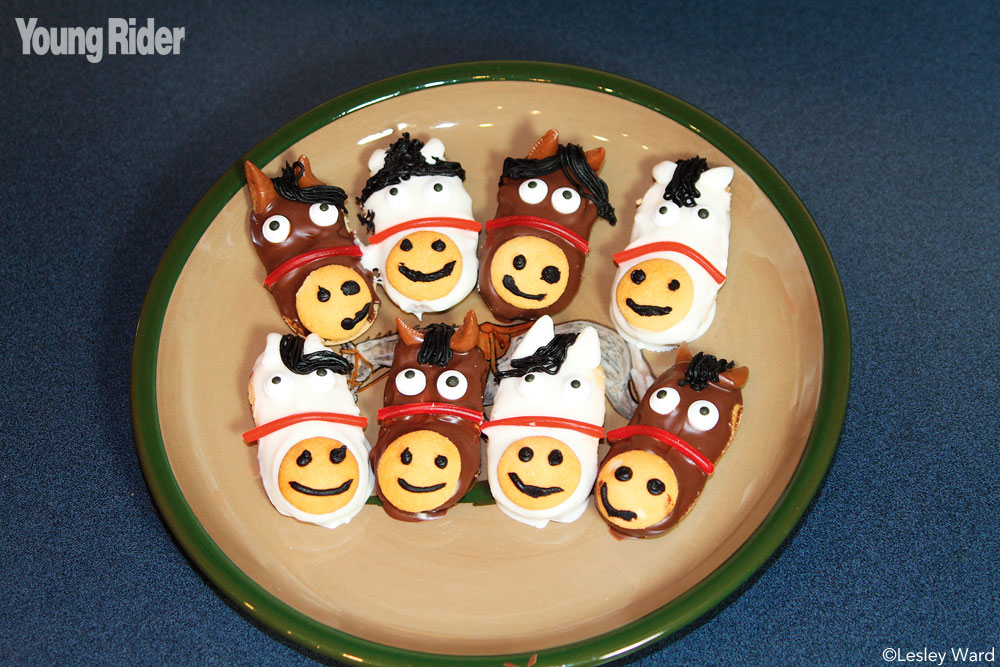
bring? Forget boring chips and dip—bring these easy-to-make horse-head cookies instead. You can find the ingredients in the cooking aisle and the candy section at the supermarket. If you can’t find the candy eyes at the market, take a trip to the cake decorating section in the local hobby store. These cute cookies are worth the extra trouble because we guarantee that everyone is going to love them!
Ingredients
- Milano milk chocolate cookies
- 4 Cooking chocolate, milk or white
- 4 Mini vanilla wafers
- 4 Tootsie Rolls
- 4 White taffy
- 4 Twizzlers Pull ‘n’ Peel sticks
- 4 Black frosting in a tube with a slim tip
- 4 Candy eyes
Horse Cookie Instructions
- Melt Away
If someone likes to cook in your house, there just might be an electric chocolate melter hidden away in the kitchen. If so, use it to melt the baking chocolate. No melter? Bring about an inch of water to a simmer in a saucepan and then place a heatproof bowl containing the chocolate over the saucepan. Don’t let the water touch the bottom of the bowl. Be patient and stir the chocolate until it’s smooth and creamy. Yum. - Horse Dunkers
Dip one side of the Milano cookie into the creamy chocolate and carefully set on a work surface. - Nilla Wafer Nose
Gently press a Nilla Wafer nose onto the bottom of the cookie. - Tiny Triangles
Cut tiny triangles out of a Tootsie Roll or taffy to make the horse’s ears. Be super careful with the knife! - Equine Ears
Gently place the ears. Press hard enough to make sure they stay in place. - Edible Eyes
Gently press the candy eyes into place. Now the cookies are starting to look like horses! - Noseband
Pull the Twizzlers apart so you’re left with skinny strands. Cut the strands into smaller pieces and press them over the face where a noseband goes.

- Finishing Touches
Squeeze the black frosting onto the cookie to make a fluffy forelock. Finally make two dots on the Nilla Wafer for your horse’s nostrils and then finish up with a smiling mouth.
- Finishing Touches

- Yum-O
Not only are these cookies easy to make, they are yummy to eat. Little brothers will love them!

Thanks to Anne Burton for making the cookies, and to Brandon for “testing” them!
This article originally appeared in the September/October issue of Young Rider magazine. Click here to subscribe!


